
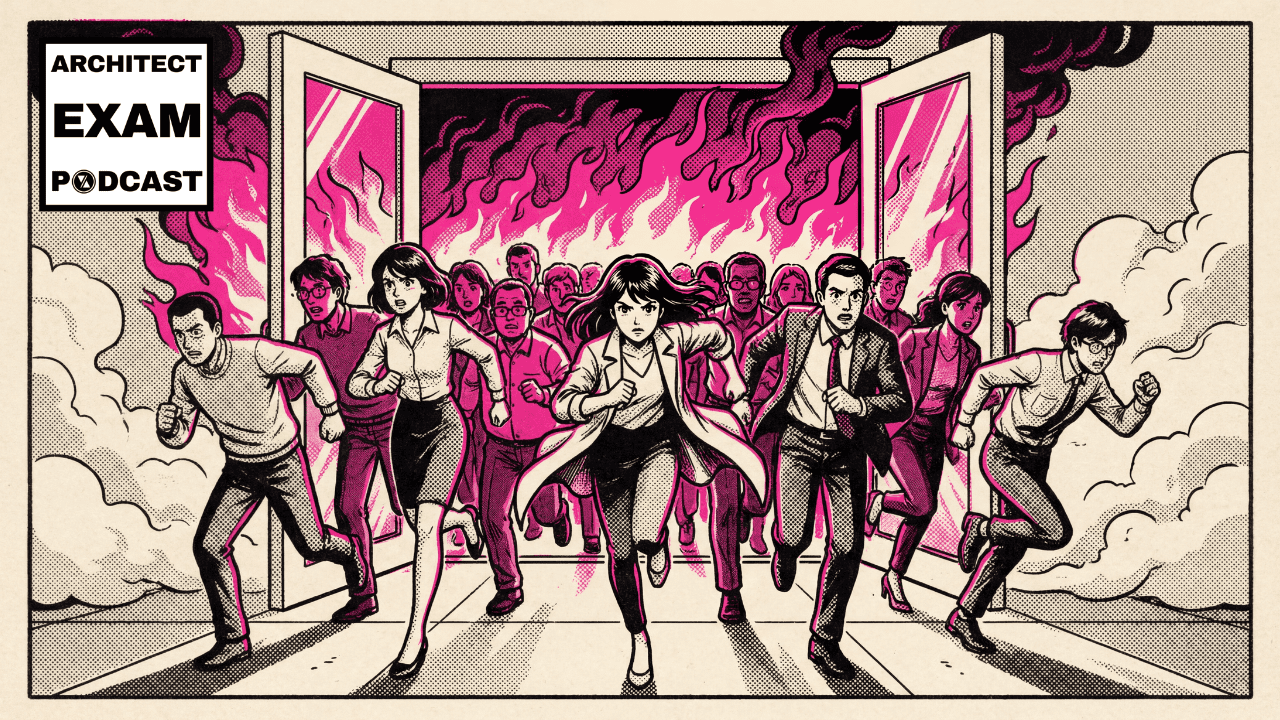

The difference between life and death during a building emergency often comes down to one thing: means of egress. These critical escape pathways aren’t arbitrary rules imposed by building officials; rather, they’re the result of hard-earned lessons from past tragedies. This guide will break down everything you need to know about creating safe exit strategies that actually work when people need them most.
This podcast is also available on YouTube, Spotify, and Apple Podcasts
Hey, quick but important note – this post is designed to help you understand egress concepts related to preparing for the Architect Registration Exam. For a deeper dive into these concepts, we’ve created extensive video content and practice questions in our Building Codes 101 course that breaks down these concepts step-by-step.
So DO NOT use this blogpost when designing real buildings, spaces, or projects that involve the health, safety, and welfare of the public! Building codes always vary by jurisdiction and get updated regularly. Always consult the most recent building codes adopted in your jurisdiction or a building code professional who is familiar with your situation. All dimensions mentioned in this article are for educational teaching purposes only. Think of this as your conceptual guide, not your legal reference.
What Does Egress Mean?
Let’s start with the basics. The definition of egress is simply a way out, or the act of leaving. That’s it. But when we talk about egress in construction, it takes on a much more specific and critical meaning.
In architecture and building design, egress meaning refers to the complete system of pathways that allow building occupants to safely exit a building during an emergency. We’re not just talking about slapping a door on a wall and calling it a day. We’re talking about a carefully designed network of corridors, stairs, doors, and pathways that gets people from wherever they are inside a building to safety outside.
The International Building Code (IBC) Chapter 10 governs all egress requirements for buildings, and it’s one of the most important chapters you’ll encounter on the ARE and in practice.
Now here’s an important distinction: egress vs exit. People use these words interchangeably all the time, but they’re not the same thing. An “exit” is actually just one specific component within the broader means of egress system. Think of it this way: every exit is part of egress, but egress includes a lot more than just the exit itself.
So now that we know what egress means, let’s break down the three components that make up a complete means of egress.
Means of Egress Components: Exit Access, Exit, and Exit Discharge
A means of egress includes these components: (1) exit access – the path to an exit, (2) exit – the protected portion like stairwells, and (3) exit discharge – the path from the exit to a public way or safe area outside.
Each point of egress in your building must provide a continuous, unobstructed path from any occupied space all the way to a public way. If any part of that chain is broken, blocked, or inadequate, the entire system fails.
But let’s break down the three parts of a means of egress in more detail:
1. Exit Access
The exit access is everything you travel through before reaching an official exit. This might include:
- Your cubicle area
- Open office spaces
- Hallways
- Corridors leading to stairwells
- Rooms you pass through to reach an exit
Think of exit access as the “journey to safety” portion of your escape route. It’s the unprotected part of your egress path, which is why the code places strict limits on how far you can travel through it.
2. Exit
The exit is the protected portion of your escape route – the part specifically designed to stay safe even when the rest of the building isn’t. Exits include:
- Enclosed fire-rated stairwells
- Horizontal exits (passing through fire-rated walls to another building section)
- Exit passageways
- Exterior exit stairways
I like to think of exits as safety bubbles inside the building. Consequently, once you’re in an exit, you’re in a protected space designed to withstand fire and smoke for a specified time period.
3. Exit Discharge
The exit discharge is the final stretch – the path from the end of an exit to a public way (typically the street or an open public space). The level of exit discharge is the floor level where occupants leave the protected exit stairwell and transition to this final portion of their escape route. In most buildings, that’s the ground floor.
After you’ve come down the stairwell and out the door, you might still need to:
- Cross a courtyard
- Walk down a sidewalk
- Travel through an alley
An exit discharge must be clearly marked, unobstructed, and lead directly to a public way or safe area away from the building. The IBC allows up to 50% of exits to discharge through the level of exit discharge (such as through a lobby) if the building is fully sprinklered and the discharge path is protected.
So to review: exit access → exit → exit discharge. As a result, this complete egress path forms the means of egress, your emergency escape route to safety.
Occupant Load: How Many People Need to Escape?
Before you can design proper egress elements, you need to know how many people need to escape. This is where occupant load comes in – it’s the number of people a space is designed to hold and drives almost every egress requirement. The occupant load is directly tied to the occupancy classification of your building, as different uses have vastly different densities of people.
How to Calculate Occupant Load
The occupant load calculation is straightforward once you understand the formula. These occupant load factors come directly from the International Building Code (IBC) Chapter 10, Table 1004.5 (the occupant load factor table), which specifies the required square footage per person based on the function of the space.
The calculation itself is simple:
Occupant Load = Area ÷ Occupant Load Factor
The occupant load factor varies dramatically based on how a space is used. Therefore, let’s look at some real-world examples:
- Office space: 3,000 sq ft ÷ 150 sq ft per person = 20 people
- Assembly space with fixed seating: 3,000 sq ft ÷ 7 sq ft per person = 428 people
- Classroom: 1,000 sq ft ÷ 20 sq ft per person = 50 people
- Library reading rooms: 2,000 sq ft ÷ 50 sq ft per person = 40 people
- Retail sales floor: 5,000 sq ft ÷ 30 sq ft per person = 167 people
- Industrial areas: 8,000 sq ft ÷ 100 sq ft per person = 80 people
- Storage/warehouse: 10,000 sq ft ÷ 300 sq ft per person = 33 people
That’s a HUGE difference!
I like to think of occupant load like personal space bubbles – in a warehouse, you get a massive bubble of personal space. In an office, a medium bubble. At a concert? Tiny bubble!
Struggling with occupant load calculations? Join our Building Codes 101 course for step-by-step examples!
Using Occupant Load to Determine Egress Requirements
If these calculations seem complex, don’t worry – our Building Codes 101 course walks through numerous examples with visual aids to help you master these formulas.
Once you know your occupant load, you can determine:
- How many exits you need: Generally, if you have 50 or more people, you need at least 2 exits. Spaces with 501-1,000 occupants need at least three exits, and spaces over 1,000 occupants need four.
- How wide your doors need to be: Multiply your occupant load by 0.2 inches per person if the building is not sprinklered, and 0.15 if it is sprinklered
- How wide your stairs need to be: Multiply your occupant load by 0.3 inches per person if the building is not sprinklered, and 0.2 if it is sprinklered
For example, if your restaurant has 300 people, you would multiply 300 by 0.2, and as a result, you need 60 inches of total exit width. That might be two 36-inch doors.
Physical Requirements for Egress Components
Egress Door Requirements: Swing Direction and Panic Hardware
Egress doors have specific requirements to ensure people can exit quickly and safely:
- Clear width: Minimum 32 inches when the door is open at 90 degrees
- Door swing direction: If a space has 50 or more people, doors must swing in the direction of egress (outward). This is one of the most commonly tested concepts on the ARE, so burn this into your brain: 50+ occupants = door swings out.
- Hardware: Must be operable without special knowledge or tools
- Panic hardware requirements: Assembly spaces with 50+ people need panic hardware (horizontal push bars). These are the bars you push to open the door in places like theaters, schools, and stadiums. The Cocoanut Grove fire of 1942 is a big reason we have panic hardware requirements today.
Standard 36-inch doors provide about 32 inches of clear width once you account for door thickness, therefore meeting the minimum egress door requirement.
Egress Corridor Width Requirements
Corridors must be wide enough to accommodate the flow of people during an emergency. The egress corridor width depends on the occupancy type and the number of people being served:
- Standard minimum: 44 inches for corridors serving 50 or more people
- Lower occupancy: Can be reduced to 36 inches if serving fewer than 50 people
- Special cases:
- Educational corridors (100+ students): 72 inches wide
- Healthcare corridors: 96 inches wide for bed movement
Think of corridor widths in terms of how many people can walk side by side:
- 36 inches: one person with personal space
- 44 inches: two people can squeeze past each other
- 72 inches: two pairs of people can pass comfortably
- 96 inches: a bed can be rolled with staff assisting on both sides
Egress Stairs: Width, Treads, and Risers
Egress stairs have their own specific requirements:
- Standard minimum width: 44 inches
- Minimum tread depth: 11 inches
- Maximum riser height: 7 inches
- Handrail requirements: 34-38 inches above the tread nosing
One question that comes up a lot: do egress stairs have to be enclosed? In most buildings over three stories, yes. Egress stairs must be enclosed in fire-rated construction to create a protected exit stairwell. The fire rating depends on the number of stories the stairwell connects: two-hour fire-rated enclosures for stairs connecting four or more stories, and one-hour for three stories or fewer. Exterior egress stairs have different requirements and may not require full enclosure depending on their distance from the building face.
Knowing these dimensional requirements is crucial for both design and passing the ARE. Furthermore, try to visualize these measurements so you can quickly identify whether a design meets code.
Means of Egress Travel Distance Limitations
There are four critical distance measurements in egress design, and they all mean different things:
1. Exit Access Travel Distance
This is the total distance from the most remote point in a space to an exit. Additionally, think of it as the longest possible escape route.
Key limits (varies by occupancy and sprinklers):
- Most common occupancies: 200 feet without sprinklers, 250-300 feet with sprinklers
- Lower hazard spaces: up to 300 feet without sprinklers, 400 feet with sprinklers
2. Common Path of Travel
This is the distance a person has to travel before they have two separate ways out. It’s the “point of no return” distance – if fire blocks your path before this point, you’re potentially trapped.
Key limits:
- Most occupancies: 75 feet without sprinklers, 100 feet with sprinklers
- High hazard areas: much shorter, around 25 feet
3. Dead-End Corridors
These are hallways that don’t lead to an exit – essentially “oops, wrong way” corridors. They have strictly limited lengths:
- Standard limit: 20 feet
- With sprinklers: can be extended to 50 feet depending on the occupancy type
4. Exit Separation Distance: The One-Third Diagonal Rule
When a building requires two or more exits, those exits can’t be right next to each other. Think about it: if both stairwells are 10 feet apart and a fire starts between them, you just lost both exits at once.
The IBC requires exits to be separated by a distance of at least one-third the maximum overall diagonal of the building or area served. In non-sprinklered buildings, that minimum jumps to one-half the diagonal.
So if your floor plate has a diagonal of 150 feet in a sprinklered building, your exits need to be at least 50 feet apart (150 ÷ 3 = 50). In a non-sprinklered building, they’d need to be at least 75 feet apart (150 ÷ 2 = 75).
This exit separation distance requirement is one of the first things that should drive your floor plan layout. If you’re placing your stairs, start with the diagonal rule and work backwards. It’s also a concept NCARB loves to test, so know it cold.
Notice how sprinklers make a huge difference across all of these distance measurements? This is because they control the fire and give people more time to escape.
When measuring these distances, you follow the actual path of travel – not “as the crow flies.” First, start from the most remote point and then trace the natural walking path to the exit.
These distance measurements can be tricky to differentiate at first. However, in our Building Codes 101 course, we use clear explanations and diagrams to help you understand exactly when and how each measurement applies to real-world scenarios.
Special Occupancy Challenges
Different building types have unique egress requirements based on their specific safety challenges. These requirements are directly influenced by the construction types and materials used:
High-Rise Buildings
High-rises (typically buildings with occupied floors 75+ feet above fire department access) require:
- Smokeproof enclosures or pressurized stairwells
- Fire service access elevators
- Re-entry from stairwells at certain intervals
Think of high-rise egress as “egress plus redundancy” – all the normal requirements plus extra safety measures because evacuation takes longer and is more complex. Moreover, the fire-resistant assemblies used in these buildings also vary in their requirements, which you can learn more about in our article on fire-resistant assemblies.
Healthcare Facilities
Healthcare presents unique challenges because many occupants cannot evacuate independently. Key features include:
- Horizontal exits: Allow patient evacuation by moving them horizontally through a fire-rated wall into another “smoke compartment” on the same floor
- Extra-wide corridors: 96-inch corridors to accommodate beds and equipment
- Defend-in-place strategy: Often the primary approach rather than full evacuation
Assembly Occupancies
Places where large groups gather have special requirements:
- Main exit rule: The main entrance that people use to enter must handle at least 50% of the total occupant load
- Seating arrangements: Detailed requirements for maximum seats in a row and spacing between rows
- Multiple exits: Carefully distributed to prevent bottlenecks
Historic Buildings
Historic structures get some flexibility with “compliance alternatives” that allow them to preserve historic features while still providing adequate safety. In fact, the code recognizes that strict adherence might be impossible without destroying historic value.
Each of these special occupancy types has its own set of unique egress requirements. Subsequently, our Building Codes 101 course breaks down these specific requirements with detailed explanations and practice questions to help you master these critical variations.
Means of Egress on the ARE Exam
Egress is a significant topic on the Architect Registration Exam that can appear on ANY ARE 5.0 exam. When analyzing a floor plan for egress compliance, you’re essentially creating an egress plan that maps every path of travel from the most remote point to the nearest exit. This skill is exactly what NCARB is testing.
However, NCARB specifically references egress being tested within the following ARE objectives:
Programming & Analysis (PA)
Don’t overlook egress in the PA exam. Even though PA focuses on the programming and analysis phase, you still need to understand how egress requirements affect early project decisions. Occupant loads, required number of exits, and travel distance limitations all shape the building program before you ever start designing. Check out our breakdown of codes and regulations for the PA exam to see how egress fits into early project analysis.
Project Planning & Design (PPD)
In PPD, egress falls primarily under Objective 2.2: “Apply building codes to building design”.
Master these concepts when studying:
- Calculating occupant loads
- Determining required number of exits
- Evaluating travel distances
- Assessing corridor widths
PPD also covers how egress requirements shape overall building design – if you need two widely separated stairs, that fundamentally affects your floor plan!
Project Development & Documentation (PDD)
In PDD, egress is covered under Objective 4.1: “Determine adherence to building regulatory requirements at the detail level”.
PDD focuses on more technical aspects, such as:
- Specific dimensional requirements
- Fire-resistance ratings for exit components
- Door hardware requirements
- Stair design details
When studying floor plans, practice identifying potential code challenges related to egress, including:
- Door swing direction issues
- Corridor width dimensions
- Dead-end corridor measurements
- Travel distance requirements
During your preparation, develop a systematic approach to analyzing floor plans:
- First, check door swings where larger occupancies might occur
- Next, measure corridor widths
- Then, check travel distances from remote corners
- Finally, verify number of exits based on occupant load calculations
As a result, this methodical analysis will strengthen your understanding of code-compliant egress design!
Want to master these concepts faster? Our Building Codes 101 course includes interactive quizzes and visual diagrams for each of these egress components.
Means of Egress FAQ
What does egress mean in construction?
Egress in construction refers to the system of pathways that allow building occupants to safely exit a building during an emergency. It includes everything from the corridors and doors you pass through to reach an exit stairwell, to the stairwell itself, to the path from the building to the street. The International Building Code (IBC) Chapter 10 establishes all egress requirements for buildings.
How many means of egress are required?
Most occupied spaces require at least two means of egress once the occupant load reaches 50 people. Spaces with 501-1,000 occupants need at least three exits, and spaces over 1,000 occupants need four. Some low-occupancy spaces with short travel distances may qualify for a single exit under specific IBC exceptions.
What is an egress plan?
An egress plan is a diagram or analysis that maps all paths of travel from every occupied point in a building to the nearest exit and ultimately to a public way. Egress plans identify exit locations, travel distances, corridor widths, door swing directions, and areas of refuge. They’re used during design to verify code compliance and are often posted in buildings as emergency evacuation maps.
Do egress stairs have to be enclosed?
In most buildings over three stories, egress stairs must be enclosed in fire-rated construction to create a protected exit stairwell. The fire rating depends on the number of stories the stairwell connects: two-hour fire-rated enclosures for stairs connecting four or more stories, and one-hour for three stories or fewer. Exterior egress stairs have different requirements and may not require full enclosure depending on their distance from the building face.
What is the difference between egress and exit?
Egress refers to the entire system of leaving a building safely, while an exit is one specific component within that system. A means of egress has three parts: exit access (the path to the exit), the exit itself (the protected portion like a fire-rated stairwell), and exit discharge (the path from the exit to a public way). So an exit is part of the means of egress, not the whole thing.
What is the level of exit discharge?
The level of exit discharge is the floor level where occupants leave the protected exit (typically the stairwell) and transition to the exit discharge portion of their escape route. In most buildings, this is the ground floor or the level with direct access to the outside. The IBC allows up to 50% of exits to discharge through the level of exit discharge (such as through a lobby) if the building is fully sprinklered and the discharge path is protected.
Quick Study Tips for Mastering Egress
To prepare for egress questions on the ARE:
- Start with IBC Chapter 10 – that’s the means of egress chapter and contains the core requirements
- Building Codes Illustrated by Francis Ching is my personal favorite resource to learn building codes. We use it in all of our ARE 101 courses and ARE bootcamp. You can find it here.
- Don’t just memorize numbers – Instead, focus on the concepts and reasoning behind the requirements
- Create flashcards for key dimensions and occupant load factors
- Implement multiple study methods rather than relying on just visual learning
- For multiple-choice questions, look for dimensional violations first
- Memorize these critical formulas:
- Occupant load = Area ÷ Occupant Load Factor
- Door/corridor width = Occupant load × 0.2″ per person
- Stair width = Occupant load × 0.3″ per person
The key dimensions you absolutely must know are:
- Minimum door clear width: 32″
- Standard corridor width: 44″ (50+ occupants)
- Healthcare corridor width: 96″
- Educational corridor width (100+ occupants): 72″
- Maximum riser height: 7″
- Minimum tread depth: 11″
These dimensions are fundamental to understanding code-compliant egress design and will serve you well throughout your career!
Get our free ARE egress study guide to ace these concepts! Just fill out the form at the top of this page.
Bringing It All Together
Understanding means of egress is about more than just passing an exam – it’s about designing safer buildings. As architects, we’re responsible for creating spaces that protect people, especially in emergencies.
Egress design connects to all other building systems:
- Structural systems must support exit stairs and fire-rated assemblies
- Mechanical systems need to coordinate with stairwell pressurization
- Electrical systems provide critical emergency lighting and egress lighting. Egress lighting is required along the entire means of egress path so occupants can see where they’re going, even during a power failure. Emergency lighting must illuminate the means of egress for at least 90 minutes.
- Fire alarm systems integrate with magnetic door holders and locks
- Fire suppression systems influence allowable travel distances
This holistic understanding of how egress integrates with all building systems is what separates good architects from great ones.
Think of egress as the connective tissue in a building – it touches everything else and therefore requires comprehensive thinking, not just knowing isolated code requirements.
Ready to take your egress knowledge to the next level? Download our free 2-page study guide summarizing these critical concepts. Just enter your email address in the form at the top of this page to get instant access.
For a deeper dive into building codes, check out the Building Codes 101 course at Young Architect Academy where we break down these concepts with visuals and practice problems.
Or join us in the next Technical ARE Bootcamp where we’ll coach you through PPD/PDD while studying and working alongside other people who are marching towards the same goal you are – kinda like architecture school!