
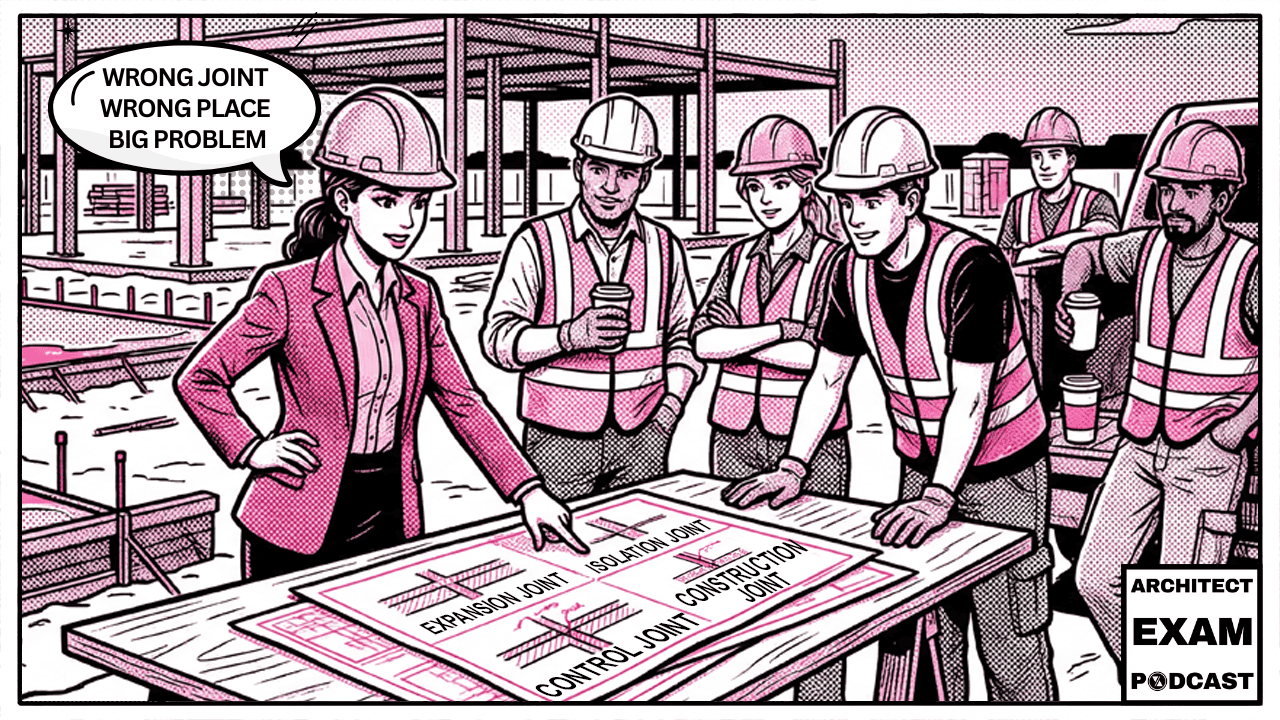

Understanding the difference between a control joint vs expansion joint is one of those things that trips up almost everyone. This guide breaks down all four joint types, expansion joints, control joints, isolation joints, and construction joints, with clear definitions, real-world examples, and memory tricks that actually stick.
This podcast is also available on YouTube, Spotify, and Apple Podcasts
Control Joint vs Expansion Joint: The Core Difference
Expansion joint. Control joint. Isolation joint. Construction joint. They all have “joint” in the name, so your brain wants to lump them together. But these four types of concrete joints are doing completely different things.
Here’s the fastest way to sort them out.
Expansion joints, control joints, and isolation joints are all about material behavior. How stuff moves, expands, cracks, and settles.
Construction joints are the odd one out. They’re about timing and schedule. When you pour concrete, when you stop, and when you come back.
That one distinction eliminates a lot of confusion right away. Now let’s break each one down.
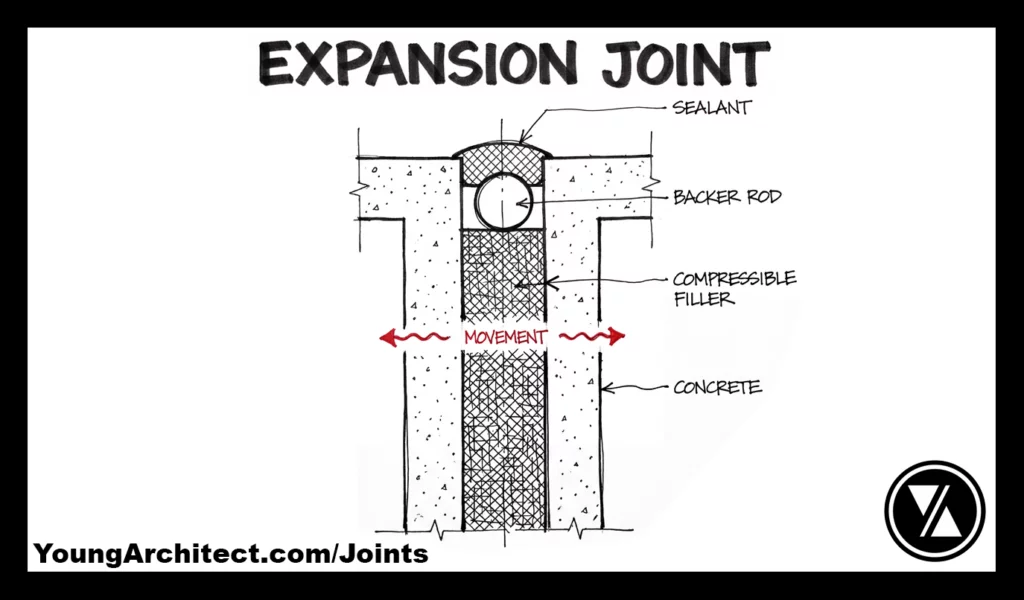
Expansion Joints: Giving Materials Room to Move
An expansion joint is wiggle room between materials. It allows movement from temperature changes, settling, and all the micro-movements that happen in buildings over time. The whole point is to let materials expand and contract without breaking.
How do they work?
Buildings move. They breathe. Materials expand when hot and contract when cold. If you don’t give them room to do that, something’s going to crack or buckle.
Expansion joints create safe space for that movement. They’re filled with compressible expansion joint filler materials like neoprene, cork, or foam that absorb movement while sealing the gap.
The stretchy jeans analogy.
Non-stretchy jeans fit perfectly when you’re standing still. But the second you sit down, they’re uncomfortable and restrictive. Stretchy jeans move with you. You can sit, bend, go about your day.
Buildings need that same flexibility. Expansion joints are the stretch in your building’s jeans.
Where you’ll see them.
Curtain wall gaskets. Those rubber gaskets between glass panels let the panels expand and contract without cracking.
Steel beam connections. Beams and girders move under load and temperature changes. The connections need intentional flexibility built in.
Bridge expansion joints. Drive over any long bridge and you’ll feel those bumps at the transitions. That’s expansion joints handling huge temperature swings.
Sidewalk expansion joints. Those wider, filled gaps between sidewalk sections let the concrete expand on hot days without buckling.
Here’s a story that drives this home. I was at a job site where they’d just installed a custom spiral staircase. Steel frame, looked amazing. As we walked up, the whole thing wiggled a little. My client got nervous. “The stairs are moving. Is that safe?”
I told him, “Actually, it’s a good sign that they’re wiggling.” Steel needs that little bit of give. It’s designed to move under load and spring back. That’s what expansion joints are all about.
ARE Exam Reminder: Expansion joints show up on PPD (selecting construction systems), PDD (detailing connections), and CE (construction observation). Think about where different materials meet and where temperature swings are significant.

Control Joints: Managing Where Concrete Cracks
Control joints work on a completely different principle. With expansion joints, you’re letting materials move without breaking. With control joints, you’re accepting that the material is going to crack and controlling where it happens.
Why concrete cracks.
When concrete cures, it shrinks. When it goes through temperature changes, it expands and contracts. All of that movement creates internal stresses that eventually lead to concrete cracking.
You can’t stop this. It’s the nature of the material. So instead of fighting it, you plan for it.
How control joints work.
Control joints are shallow saw cuts or grooves placed at regular intervals. You’re creating intentional thin spots in the material. When the inevitable cracking happens, it follows that planned line of weakness instead of zigzagging randomly across the surface.
Contractors typically come back after a pour with a saw and cut these grooves. That’s why you’ll hear them called saw cut concrete joints. The depth and concrete control joint spacing matters. Too far apart and the concrete cracks between the joints. Too shallow and the crack ignores the groove entirely.
The paper towel analogy.
Paper towels have perforations. Those dotted lines where you’re supposed to tear. The manufacturer knows you’re going to tear the paper towel. That’s the whole point. So they give you a line to tear along for a clean break.
Without those perforations, you’d rip the thing in half and end up with a jagged mess.
Control joints are the perforations in your concrete. You know it’s going to crack. So you give it a line to crack along.
Where you’ll see them.
Sidewalks. Those cuts every few feet? Control joints. Look closely and you’ll often see a tiny crack running along the bottom of that groove. That’s the joint doing its job perfectly.
Garage floors, driveways, warehouse slabs. Anywhere you’ve got a large expanse of concrete, you need control joints to manage where the concrete shrinkage cracks end up.
Plaster walls. Same concept. Reveals or grooves guide cracking along those lines instead of across the middle of the wall.
One common mistake: people look at control joints and think they’re drainage channels or separate panels of material. They’re not. They’re just planned weak points. Shallow cuts in a continuous piece of material.
ARE Exam Reminder: Control joints appear on PA (evaluating existing buildings), PPD/PDD (specifying and detailing concrete), and CE (observing pours and verifying spacing and depth).
Isolation Joints: Complete Separation for Independent Movement
Expansion joints let things move together. Control joints manage where cracking happens. But what about when two parts of a building need to move completely independently?
That’s where isolation joints come in.
Why some elements need personal space.
Picture a concrete slab with a column running through it. The column sits on a deep footing way down in the ground. The slab is just on grade, sitting on compacted soil.
When the slab moves from shrinkage, settling, or temperature changes, it’s moving independently from that column. If they’re connected, you get cracking near the column. Or worse, you damage pipes running through the slab.
An isolation joint creates a complete gap between the slab and whatever element needs to move independently.
The roommates with separate doors analogy.
The column and the slab are roommates on completely different schedules. One comes home late, the other’s already asleep. If they share the same entrance, they’re constantly bumping into each other.
The isolation joint gives each roommate their own door. Personal space for building elements.
The critical detail: rebar does NOT continue through.
This is the single most important thing to remember about isolation joints. No rebar through the joint. You’re intentionally breaking the structural connection. It’s a full-depth separation from the top of the slab all the way down to the subbase.
Where you’ll see isolation joints:
Around columns in parking garages. That circular or diamond-shaped gap around each column? Isolation joint.
Where floor slabs meet exterior walls. The wall is on a foundation, the slab is on grade. They need separation.
Around drain pipes and standpipes. Anything penetrating through the slab needs an isolation joint so movement doesn’t damage the pipe.
The joint gets filled with compressible material, usually foam, cork, rubber, neoprene, or asphalt-impregnated fiberboard. Typically half an inch to one inch wide, running the full depth of the slab. This isn’t optional. Skip it and you’re guaranteeing cracks.
ARE Exam Reminder: Isolation joints show up on CE (observing construction and verifying placement) and PDD (detailing floor systems and penetrations). Remember: no rebar through.

Construction Joints: Bookmarks in the Build
Construction joints work on a completely different principle from the other three. They’re not about material behavior at all. They’re about the construction schedule.
Why you can’t pour everything at once.
Your crew is making great progress pouring a slab. Then it’s 5 PM and everybody goes home. Or it starts raining. Or the concrete truck breaks down.
You can’t pour more concrete than you can properly finish in one work period. So you stop, create a planned stopping point, and pick up where you left off tomorrow. That stopping point is a construction joint.
How they maintain structural continuity.
Here’s the critical distinction. Rebar continues through a construction joint. You need structural continuity. The new concrete needs to bond with the old concrete and act like one continuous slab.
The rebar extends past the stopping point. Sometimes it’s left sticking out, sometimes it’s housed in protective boxes. When the crew comes back, that rebar laps with the new rebar to maintain structural integrity.
You’ll also see something called a keyway, a groove cut into the first pour. When new concrete goes in, it locks into that groove, creating a mechanical connection between old and new.
The bookmark analogy.
You’re reading a long book but need to stop for the night. The bookmark saves your place. When you come back, the story continues. The plot doesn’t end because you stopped reading.
Construction joints work the same way. The rebar is the storyline that continues through.
Construction joints vs. cold joints.
A construction joint is planned. A cold joint in concrete is an accident. It happens when the first pour starts to set before the next pour arrives. Maybe the truck was late. The result is a weak plane where the two pours meet.
Planned stops good. Unplanned stops bad. That’s why construction administrative procedures and pour sequencing matter so much.
ARE Exam Reminder: Construction joints appear heavily on CE (construction observation, sequencing, contractor coordination). Remember: rebar goes through, structural continuity maintained.
The Rebar Test: How to Tell Them Apart Fast
When you need to quickly sort these joints out, ask two questions.
Question 1: Is this joint about material behavior or construction schedule?
If it’s about schedule, it’s a construction joint. Done.
Question 2: Does rebar go through the joint?
No rebar = isolation joint. Complete separation.
Rebar continues through = construction joint. Structural continuity.
For the other two:
expansion joints use compressible filler between separate elements.
Control joints are shallow surface cuts in a continuous piece of material.
Quick reference:
Expansion Joint: Compressible filler. Where different materials meet. Allows movement. Think stretchy jeans.
Control Joint: Shallow saw cuts. Planned weak points. Controls where cracking happens. Think paper towel perforations.
Isolation Joint: Full-depth gap. No rebar. Complete independence. Think roommates with separate doors.
Construction Joint: Planned pour stop. Rebar continues through. Schedule-driven. Think bookmarks.
Study Joints for the ARE
Understanding the difference between a control joint vs expansion joint shows up across multiple divisions on the Architect Registration Examination. You’ll see joint questions on PPD when selecting systems, on PDD when detailing components, and on CE during construction observation.
When you see a joint question, don’t panic. Think about what the joint is doing, not just what it’s called. Is it allowing movement? Managing cracking? Separating elements? Marking a pause in construction?
If you want to go deeper with practice questions and detailed exam strategies, check out PDD 101 at Young Architect Academy. And if you want structured coaching with a clear roadmap and accountability, ARE Boot Camp gives you ongoing support until you’ve passed all your exams.